26/09/2015
Charlotte Bethany Henderson
100359031
Our first task within the topic of Games Texture Development we were assigned to model and texture a crate, to help people adapt to using Maya if they were unfamiliar with it.
I started off modelling the crate by creating a primitive cube, I did this in order to create a single face with the manipulation tools set in the centre of the original cube rather than in relation to the single face. I got the single face by selecting all the faces that I don't want to use with the marquee, and then deleting them.
 |
| Original primitive cube. |
 |
| Face that will be modeled. |
Once I have the face of the crate that I'm working with, I extruded the face, and shrank it down so that I had a smaller square inside of the original. However, when you do this you end up having an extra face behind the one that you're working with, which needs to be deleted, so I go behind the face that I'm working with, choose to select faces, and click and delete the extra face that is causing the issue with the model.
 |
| Extra face causing error. |
 |
| Extruded 2nd face. |
Once I was happy with how this face of the crate looked, I created the UV map for this face, so that I could start applying textures. By doing this before fully assembling the crate, it means that all of the faces of the crate will share the same UV maps. In hindsight I should have created two separate UV maps, so that I could apply two separate textures to my crate easily.
 |
| UV map for crate. |
 |
| Final face that UV map is for. |
 |
| Final model of the crate. |
Added 13/10/2015
Texturing of the crate
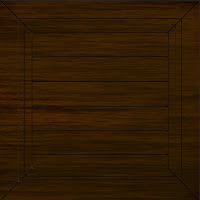
 I began by developing a simple wood grain base for the crate, by using the 'Fibers' tool under Render. This creates a difference in tone that looks a lot like wood grain. I then put in lines to separate the wood into planks, I did this using the Marquee tool, and filling the inside using 'Stroke' and bevel embossing this line. I then simply duplicated the same line several times and moved them down the face of the crate.
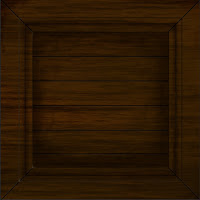
I then added shading and wear around the areas of the crate that needed it, as well as areas that looked as though they had been scuffed etc. I did this by using Marquees to ensure that I didn't work into areas that I didn't want to, and then used a large stippled paintbrush, to cover areas in a rough smudgey way, which was then set to Multiply and the opacity turned down to around 50%. I did this several times in different shades, and worked back into each layer using the eraser on a low opacity setting as well.
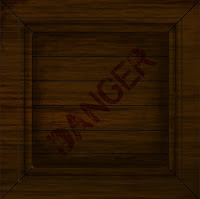
 As the final touch, I decided to add some text to the crate, and went online to find an appropriate free text to use. I ended up choosing CF Nuclear War Regular from 1001freefonts.com as I felt like it worked well with the style I was going for.
I applied this on the text 'DANGER' which was in a dark red, set to Multiply and the opacity once again turned down.
Unfortunately because of the way I have done the UVs every side of the crate will have the same texture applied to it, which if I redid this task now, I would have done the UVs differently, so as to allow some sides to be plain wood and some sides to have the text on. This may be something that I go back to and change in the future, but I didn't feel like it had too negative of an impact on my work currently so I have chosen to leave it for the time being.

