02/10/2015
Charlotte Bethany Henderson
100359031
This week we were taught how to create photo-realistic images in Photoshop, using Photo Manipulation. Our task was to turn an everyday alleyway, into one that has been rundown and ruined.
I started off with an image of a relatively average alleyway that was found on Google Images.
I started by applying block layers over objects in the picture that were too 'bright' and stood out too much from the background, to create an effect that looks like they'd been covered in dirt etc.
I did this over the bin and the boxes at the bottom left of the image, by using the marquee tool to select the area that I wanted to change, then filling that area using the bucket tool. On this layer I then turned the opacity down, so that you could still see the original object through the 'filter'. This layer was also set to 'Multiply' in the layer options.
 After this I proceeded to start adding more to the image, by finding suitable images from Google and merging them into the original image that I was working from.
I chose to start by working cracks into both the floor and wall, to make it look as if the area was crumbling. This was done by adding the images as embedded images to separate layers, and manipulating them into position, then erasing any areas I didn't want to be included, turning down the opacity again, and changing the layers to the best layer option that suited them. (The crack in the floor on 'Darken' and the crack in the wall on 'Multiply'.)

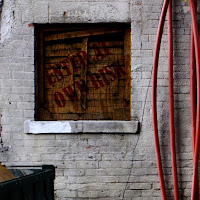
On top of the window on the left, I also added text, a 'Enter at Own Risk' sign, this was done by using a text box, which I used to insert and edit the text, which was then set to free transform, and manipulated into place. This layer was set to 'Multiply'.

After this I added in two graffiti tags using the same method as add in the cracks to the walls, turning down the opacity to make them look as if they were old and an attempt to remove them had been made. 'Multiply' was once again used, to allow the underlying brickwork to show through, making them look apart of the wall, rather than like they had been added onto the image later.
After this two final layers of a gradient map and a layer mask were added to bring all of the components together into a grungy looking alleyway.
 |
| Comparison between Original image and Final image |


No comments:
Post a Comment